Logga in
Artikel: How to Update Your Motherboard BIOS Safely
How to Update Your Motherboard BIOS Safely

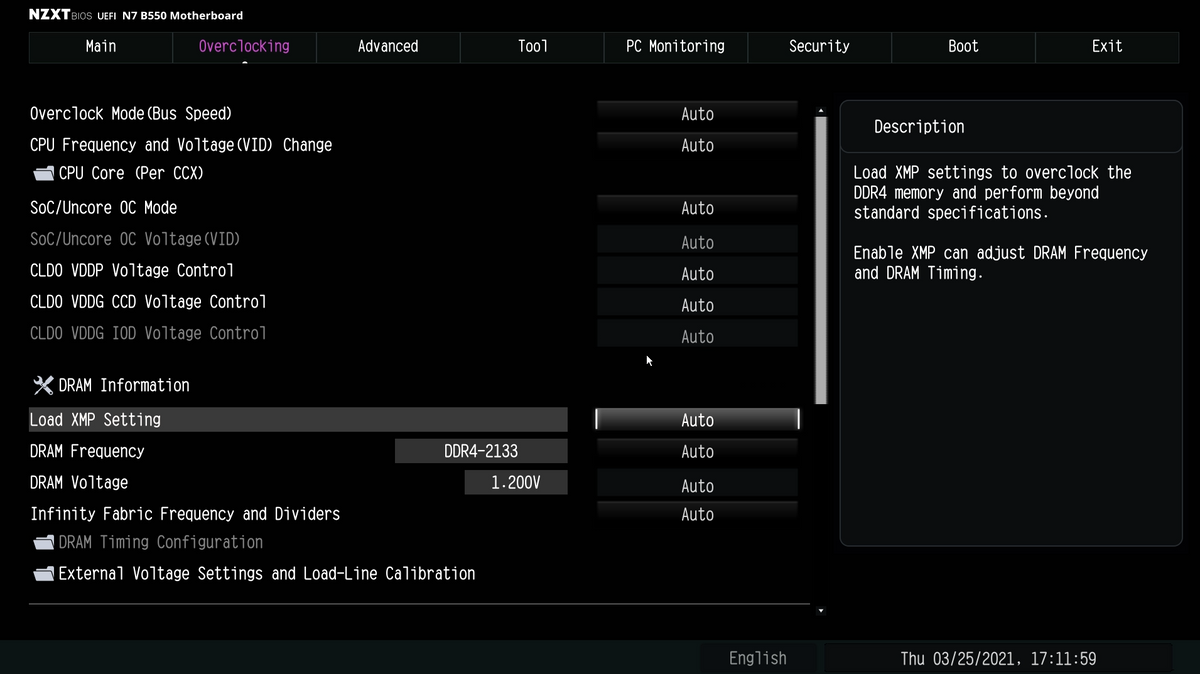
Short answer: Download the BIOS file from your motherboard's product page, copy it onto a USB drive formatted FAT32, reboot into the UEFI, open Tool then Instant Flash, and select the file. Disable fTPM or Intel PTT first, and do not shut down or unplug anything while it runs. Load UEFI defaults afterwards.
Updating a motherboard BIOS sounds risky and mostly is not, provided you do not interrupt it. On NZXT N series motherboards the built-in Instant Flash tool handles the whole thing from inside the UEFI, so there is no bootable media to build and no Windows utility to trust.
When you actually need to do this
Not as often as forums suggest. Good reasons include a security update, support for a newer CPU, a fix for a specific bug you are hitting, or a feature you need that your current version lacks. "It is newer" is not on its own a reason. If your system is stable and does everything you need, you can leave it alone.
Step 1: Get the file
Download the latest UEFI BIOS for your exact motherboard model from its product page. Board revisions matter, so make sure the model string matches what you actually own.
Step 2: Prepare a FAT32 USB drive
Instant Flash can only read a drive formatted FAT16 or FAT32. Most flash drives 32GB and under are already FAT32 out of the box. Larger drives are usually exFAT or NTFS, and Instant Flash will not see them.
If yours is exFAT or NTFS and is 32GB or smaller, reformat it: right-click the drive in Windows, choose Format, set the file system to FAT32, and click Start.
Formatting erases everything on the drive. Back up anything you care about first.
Open the downloaded .zip and copy the update file itself onto the drive. You want the firmware file, not the zip.
Step 3: Boot into the UEFI
Two ways in:
- Restart and press F2 or Delete at the NZXT splash screen, before Windows starts loading.
- Or hold Shift while clicking Restart in the Start menu, then choose Troubleshooting to Advanced Options to UEFI Firmware Settings and click Restart.
Step 4: Disable fTPM or PTT first
You will likely see a warning about suspending BitLocker and anything else relying on TPM. Take it seriously. Before flashing, disable AMD fTPM or Intel Platform Trust Technology (PTT) depending on your platform.
Skipping this can leave BitLocker demanding a recovery key after the update, which is a bad surprise if you do not have that key to hand. You can re-enable it afterwards, and our Secure Boot guide covers turning TPM and Secure Boot back on.
Step 5: Run Instant Flash
- With the flash drive inserted, click Tool in the UEFI.
- Select Instant Flash. It scans connected drives for a valid update file.
- The detected file appears with the option to Update or Rescan Device. If you have several versions on the drive, pick the newest.
- Confirm the prompt asking whether you are ready to update.
Do not shut down, unplug, or connect anything while the updater runs. Interrupting a BIOS flash is the one genuine way to brick a motherboard. If you are on a desktop without a UPS and your power is unreliable, wait for a better moment.
When it finishes you will get a prompt to restart. Let it.
Step 6: Load UEFI defaults
This step gets skipped constantly and causes most of the "my PC is weird after a BIOS update" posts.
Go to the Exit screen, choose Load UEFI Defaults, select Yes, then Save Changes and Exit.
A BIOS update can leave old settings in a state the new firmware does not expect. Loading defaults clears that. You will then need to re-apply anything you had configured, which typically means XMP or EXPO, Secure Boot, fan curves and boot order.
One warning specific to early N7 B550 boards
Early runs of the NZXT N7 B550 shipped with BIOS version P1.10. Those boards need the BIOS Flashback firmware updated before a normal BIOS update. Updating the BIOS first can brick the board.
The Flashback Firmware Updater is on the product page and runs from within Windows: extract the zip, right-click FlashbackFWUpdate.bat and choose Run as administrator, then press any key when it appears. Once it completes, the board is ready for normal updates.
If your N7 B550 is on P1.10, do this first. If you are on anything newer, this does not apply to you.
Frequently asked questions
Can a BIOS update brick my motherboard?
Only really if it is interrupted, or if you flash the wrong file for your board. Match the model exactly, do not power off mid-flash, and you are very unlikely to have a problem.
Why will Instant Flash not find my USB drive?
Almost always because the drive is exFAT or NTFS rather than FAT32. Reformat it to FAT32. Also check you copied the firmware file out of the zip rather than the zip itself.
Do I need to update my BIOS?
Only if you need something from it: a security fix, newer CPU support, a bug fix, or a feature you are missing. A stable system does not need chasing the latest version.
Will a BIOS update erase my drives?
No. It updates the motherboard firmware and does not touch your storage. It does reset your BIOS settings, which is why you reload defaults and reconfigure afterwards.
Why disable TPM before updating?
Drive encryption such as BitLocker ties into the TPM. A firmware change can invalidate that relationship and leave Windows demanding a recovery key at boot. Disabling it first avoids the situation.
My PC will not start after a BIOS update. What now?
Clear the CMOS first, since a leftover setting incompatible with the new firmware is the usual cause. If it still will not POST, work through our PC will not turn on guide.
Need a hand?
If you are not sure which file your board needs, or you want someone to sanity-check the version before you flash, ask us at NZXT Support.
NZXT motherboards

The N series
Every current N series board has Instant Flash built into the UEFI, so an update is a FAT32 stick and two minutes. No bootable media and no Windows utility.
See NZXT motherboards